The Char-Broil Oil-Less Fryer offers a healthier alternative to traditional frying, using infrared technology for crispy results without oil. This innovative appliance is designed for safety and efficiency, making it ideal for cooking turkeys and other dishes. The included manual provides essential guidance for proper assembly, operation, and maintenance to ensure a great cooking experience;
1.1 Overview of the Char-Broil Oil-Less Fryer
The Char-Broil Oil-Less Fryer is a revolutionary cooking appliance that uses infrared technology to deliver crispy results without the need for oil. Designed for outdoor use, it operates with propane gas, ensuring even cooking and a mess-free experience. This fryer is ideal for cooking turkeys, chicken, and other dishes, offering a healthier alternative to deep-frying. Its compact design and user-friendly controls make it a versatile addition to any outdoor kitchen. The appliance is built for safety and efficiency, providing consistent performance for delicious meals.
1.2 Key Features and Benefits
The Char-Broil Oil-Less Fryer features infrared technology for crispy cooking without oil, promoting healthier meals. It operates efficiently with propane gas, ensuring consistent results. The appliance includes a food thermometer for precise temperature monitoring, enhancing safety and flavor. Its design allows for mess-free cooking, making cleanup easier. With a focus on safety, the fryer includes a regulator/valve assembly and clear ignition instructions. These features make it an ideal choice for outdoor cooking, offering convenience, efficiency, and delicious outcomes without the hassle of traditional frying methods.
1.3 Importance of the Manual
The manual is essential for safely assembling and operating the Char-Broil Oil-Less Fryer. It provides critical instructions for proper setup, maintenance, and troubleshooting; By following the manual, users can ensure optimal performance, prevent accidents, and extend the appliance’s lifespan. The guide includes vital safety precautions, operating procedures, and warranty details. Ignoring the manual’s instructions may lead to unsafe conditions or damage to the fryer. Always refer to the manual for guidance to enjoy a safe and successful cooking experience with the Char-Broil Oil-Less Fryer.
Safety Precautions and Warnings
Always use the Char-Broil Oil-Less Fryer with LP gas and the supplied regulator/valve assembly. Follow all safety guidelines in the manual to avoid accidents and ensure proper function.
2.1 General Safety Guidelines
Always read and follow the Char-Broil Oil-Less Fryer manual carefully. Ensure the fryer is placed on a stable, heat-resistant surface away from flammable materials. Keep children and pets at a safe distance. Never leave the fryer unattended during operation. Use protective gloves and eyewear when handling hot surfaces or sharp components. Ensure proper ventilation to avoid gas buildup. Follow all safety warnings and instructions to prevent accidents and ensure safe cooking experiences. Regularly inspect the fryer for damage or wear and tear. Never modify the fryer or use unauthorized parts, as this can lead to hazardous conditions. Always turn off the fryer and let it cool before cleaning or performing maintenance. Keep the fryer away from direct sunlight and moisture to prevent damage. Familiarize yourself with emergency shutdown procedures in case of malfunctions. Always store the fryer in a dry, well-ventilated area when not in use. Keep emergency contact information handy in case of an accident. Never use abrasive cleaners or scouring pads, as they may damage the fryer’s finish. Ensure all connections are secure and leak-free before each use. Follow the manufacturer’s guidelines for gas line installation and maintenance. Keep a fire extinguisher nearby for emergencies. Never use the fryer in enclosed spaces without proper ventilation, as this can lead to carbon monoxide buildup. Always follow local safety regulations and codes when installing or operating the fryer. Be cautious when handling hot pans or accessories, as they can cause burns. Never leave the fryer unattended near open flames or sparks. Always ensure the fryer is turned off and cooled before covering or storing it. Keep the fryer away from children and pets to avoid accidental injuries. Regularly check for any blockages in the vents or burners, as they can cause unsafe operating conditions. Always use the fryer on a level surface to prevent tipping or instability. Follow the recommended cooking times and temperatures to avoid overcooking or undercooking food, which can lead to foodborne illnesses. Never use the fryer if it is damaged or malfunctioning, as this can pose serious safety risks. Always refer to the manual for specific safety instructions related to your model. Stay alert and attentive while operating the fryer to ensure a safe and enjoyable cooking experience. Keep the fryer clean and well-maintained to prevent grease buildup and potential fires. Always use the fryer in accordance with its intended purpose and design. Never attempt to repair the fryer yourself unless you are qualified to do so, as this can lead to further damage or safety hazards. Always follow the manufacturer’s instructions for assembling, operating, and maintaining the fryer to ensure optimal performance and safety. Keep the fryer’s serial number and purchase date handy for future reference or warranty claims. Always be prepared for emergencies by having a plan in place, such as knowing how to extinguish a grease fire or handle a gas leak. Never use the fryer near water or in damp environments, as this can lead to electrical hazards. Always ensure the fryer is properly preheated before cooking to achieve the best results and avoid food contamination. Keep the fryer’s manual in an accessible location for quick reference during operation or maintenance. Never use the fryer as a storage container, as this can attract pests or create safety hazards. Always follow the recommended cleaning schedule to maintain the fryer’s performance and hygiene. Keep the fryer’s vents and burners clear of debris to ensure proper airflow and combustion. Never use the fryer in areas with poor ventilation, as this can lead to the accumulation of harmful fumes. Always use the fryer’s accessories and parts as specified in the manual to avoid compatibility issues or safety risks. Keep the fryer’s power cord or gas line organized and secure to prevent tripping or damage. Never use the fryer in extreme weather conditions, such as high winds or heavy rain, as this can affect its performance and safety. Always ensure the fryer is installed and operated by an adult or a qualified professional to minimize safety risks. Keep the fryer’s warranty information and customer support contact details accessible for any inquiries or issues. Never use the fryer if you are unsure about its proper operation or safety features, as this can lead to accidents. Always refer to the manual for troubleshooting common issues before attempting any repairs. Keep the fryer’s cooking basket and accessories clean and dry to prevent bacterial growth and contamination. Never use the fryer near open windows or doors, as this can cause drafts that affect combustion or heat distribution. Always
2.2 Installation Safety Tips
Ensure the Char-Broil Oil-Less Fryer is installed on a stable, heat-resistant surface, away from flammable materials. Keep it at least 6 inches away from walls or combustible objects. Install the fryer in a well-ventilated area to prevent gas fumes accumulation. Use a certified technician for gas line connections to avoid leaks. Follow local building codes and regulations. Never install the fryer near water sources or in damp environments. Ensure all electrical connections are secure and meet safety standards. Keep the fryer away from direct sunlight and heat sources. Always refer to the manual for specific installation requirements.
2.3 Operating Safety Instructions
Always preheat the Char-Broil Oil-Less Fryer with the lid closed to ensure even heat distribution. Use oven mitts or tongs to handle hot baskets or food. Never leave the fryer unattended while in operation. Keep children and pets away from the unit when it is in use. Avoid overheating food, as it can cause flare-ups. Regularly inspect the fryer for damage or wear. Turn off the fryer and let it cool before cleaning or performing maintenance. Always follow the recommended temperature settings to prevent accidental burns or fires.

Assembly Instructions
Begin by unpacking and inventorying all components. Follow the step-by-step guide to assemble the fryer, ensuring all parts are securely fastened. Refer to the manual for specific instructions and safety precautions during assembly to avoid damage or injury. Proper assembly is crucial for safe and efficient operation of the Char-Broil Oil-Less Fryer.
3.1 Unpacking and Inventory
Begin by carefully unpacking the Char-Broil Oil-Less Fryer from its box. Ensure all components, including the fryer basket, lid, and drip tray, are accounted for. Refer to the manual’s inventory list to confirm no parts are missing. Inspect each item for damage or defects. If any component is damaged or missing, contact customer support immediately. Properly organizing the parts will streamline the assembly process and ensure everything fits together correctly. Store unused items in a safe place to avoid misplacement or damage during assembly.
3.2 Step-by-Step Assembly Process
Begin by assembling the fryer’s base and legs using the provided hardware. Attach the legs securely to ensure stability. Next, align the fryer basket with the base and lock it into place. Ensure the basket is level for even cooking. Attach the lid by aligning the hinges and tightening the screws. Secure the lid tightly to prevent heat from escaping. Finally, connect the drip tray and position it under the fryer. Double-check all connections to ensure they are tight and properly aligned. Refer to the manual for specific torque settings and alignment guides. Once assembled, test the fryer’s stability before use.
3.3 Final Assembly Checks
After assembling the Char-Broil Oil-Less Fryer, perform a final inspection to ensure all parts are securely attached. Check for loose screws and tighten them if necessary; Verify that the lid aligns properly with the base and closes tightly. Ensure the basket and drip tray are correctly positioned and functioning as intended. Inspect for any signs of damage or wear on moving parts. Finally, conduct a test run without food to ensure the fryer operates smoothly and evenly. This step guarantees safety and optimal performance before cooking begins.
Operating the Char-Broil Oil-Less Fryer
Learn to operate the fryer safely and effectively. Understand ignition, temperature control, and cooking times for perfect results. Follow guidelines for oil-less frying to achieve crispy, flavorful food with minimal effort and mess.
4.1 Ignition and Startup Procedure
Ensure the Char-Broil Oil-Less Fryer is properly assembled and placed on a heat-resistant surface. Plug in the unit and press the power button. Allow the fryer to preheat for 10-15 minutes. Use the ignition button to light the burner, following the manual’s specific instructions. Once lit, set the desired temperature using the control knob. Always preheat the fryer before adding food for optimal performance. Refer to the manual for detailed ignition steps to ensure safe and efficient operation.
4.2 Temperature Control and Monitoring
The Char-Broil Oil-Less Fryer features a precise temperature control knob, allowing you to adjust heat settings between 250°F and 400°F. Always preheat the fryer to the desired temperature before cooking. Use the built-in temperature gauge to monitor heat levels accurately. For consistent results, avoid overcrowding the basket and adjust the burner flame as needed. Regularly check the temperature during cooking to ensure it remains stable. Proper temperature control is key to achieving crispy, evenly cooked food without excess oil.
4.3 Cooking Time and Guidelines
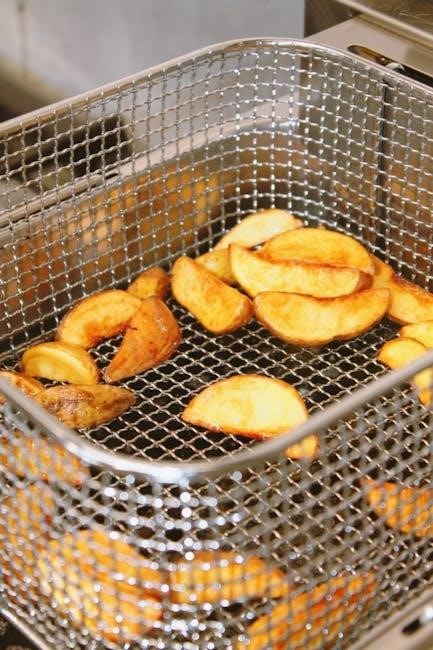
Cooking times vary depending on the food type and portion size. Preheat the fryer to the recommended temperature before adding food. Adjust the burner flame to maintain consistent heat. For most foods, cook in batches to avoid overcrowding. Typical cooking times range from 15-30 minutes, depending on the item. Chicken wings may take 20-25 minutes, while fries require 15-20 minutes. Always flip food halfway through cooking for even results. Use the timer to monitor cooking progress and avoid overcooking. Refer to the manual for specific guidelines for different foods.

Maintenance and Cleaning
Regular cleaning is essential for maintaining the Char-Broil Oil-Less Fryer. After each use, clean the basket and pan with soap and water; For tougher residue, soak or use a gentle scrub. Dry thoroughly to prevent rust. Schedule deep cleaning every month for optimal performance.
5.1 Regular Cleaning Tips
Regular cleaning is crucial for maintaining your Char-Broil Oil-Less Fryer’s performance and longevity. After each use, clean the fryer basket and pan with mild soap and warm water. Avoid using abrasive cleaners or scrubbers, as they may damage the finish. Wipe down the exterior with a damp cloth to remove splatters and spills. Dry all parts thoroughly to prevent rust. For tough food residue, soak the basket and pan in warm soapy water before scrubbing gently. Regular maintenance ensures optimal cooking results and keeps your fryer in great condition.
5.2 Deep Cleaning and Sanitizing
Deep cleaning and sanitizing your Char-Broil Oil-Less Fryer is essential for maintaining hygiene and performance. Detach all removable parts, including the basket and pan, and soak them in hot soapy water. Use a soft brush to scrub away stubborn food residue. Mix equal parts water and white vinegar in the fryer and heat it to 300°F for 30 minutes to sanitize. Wipe the interior with a damp cloth and mild detergent, avoiding abrasive cleaners. Rinse thoroughly and dry all components before reassembling to prevent rust and ensure optimal function.
5.3 Storage and Maintenance Tips
To maintain your Char-Broil Oil-Less Fryer, store it in a dry, cool place when not in use. Ensure all components are clean and dry to prevent rust. Cover the fryer to protect it from dust. Regularly inspect hoses and connections for damage. Store accessories separately to avoid damage. Avoid leaving food residue or moisture inside, as this can lead to mold or corrosion. Proper storage and maintenance will extend the lifespan of your fryer and ensure optimal performance for future use.
Troubleshooting Common Issues
Address common issues like uneven cooking or malfunctioning controls by checking connections and cleaning components. Refer to the manual for specific solutions to ensure optimal performance.
6.1 Common Problems and Solutions
The Char-Broil Oil-Less Fryer may occasionally face issues like uneven cooking or malfunctioning controls. Ensure proper preheating and check food placement for even cooking. If the fryer doesn’t turn on, verify power connections and circuit functionality. For temperature inconsistencies, clean the heating element and ensure proper ventilation. Refer to the troubleshooting guide in the manual for detailed solutions. Regular maintenance, such as cleaning air vents and food trays, can prevent many common issues. Always follow safety guidelines when addressing problems to avoid further complications.
6.2 Ignition and Gas-Related Issues
If the burner fails to ignite, check the propane tank for sufficient gas and ensure connections are tight. A clicking sound during ignition may indicate a faulty igniter; try lighting the burner manually with a match. If the flame goes out or is uneven, clean the burner ports and ensure proper airflow. A strong gas smell could signal a leak; turn off the gas supply immediately and inspect hoses. Reset the fryer by turning it off and on again if ignition issues persist. Always follow safety protocols when handling gas-related problems.
6.3 Temperature Fluctuation Solutions
If the fryer’s temperature fluctuates, ensure the lid is closed properly to maintain heat. Check the thermometer for accuracy and adjust if necessary. Clean the heating element and vents to ensure proper airflow. If the temperature drops suddenly, verify that the propane tank is not empty. Avoid overcrowding the basket, as this can disrupt even heating. For persistent issues, reset the fryer by turning it off and on again. If problems continue, refer to the manual or contact customer support for assistance.

Accessories and Replacement Parts
The Char-Broil Oil-Less Fryer offers various accessories, such as cooking baskets, pans, and utensils, to enhance your cooking experience. Replacement parts like burners, heating elements, and knobs are available on the official website or authorized retailers. Always use genuine parts to maintain performance and safety.
7.1 Recommended Accessories
To maximize your cooking experience with the Char-Broil Oil-Less Fryer, consider these recommended accessories:
– Cooking Baskets: Ideal for even air circulation and easy food handling.
– Pans and Trays: Great for marinating or storing food before cooking.
– Utensils: Heat-resistant tongs and spatulas for safe food flipping.
– Covers: Protects the fryer from dust and outdoor elements.
– Liners: Makes cleanup easier by containing grease and debris.
These accessories are available on the Char-Broil website or authorized retailers. Always ensure compatibility with your specific model for optimal performance.
7.2 Replacement Parts Availability
Replacement parts for the Char-Broil Oil-Less Fryer are widely available through official channels. Visit the Char-Broil website or authorized retailers to purchase genuine components. Commonly replaced parts include heating elements, burners, and drip trays. Ensure compatibility by referencing your fryer’s model number. Online marketplaces like Amazon also offer a range of compatible parts. Always verify authenticity to maintain performance and safety. Regularly check for updates or recalls to keep your fryer in optimal condition. Genuine parts are designed to meet safety and quality standards.
7.3 Upgrading and Customization Options
The Char-Broil Oil-Less Fryer offers opportunities for customization to enhance your cooking experience. Users can upgrade to a rotisserie attachment for even cooking or add a smoker box for infusing flavors. Customizable drip trays and cooking racks are available to optimize space and efficiency. For personalization, consider adding a custom finish or engraving. Additionally, third-party accessories like smart temperature controllers can be integrated for advanced monitoring. Explore these options to tailor your fryer to your specific needs and preferences, ensuring a unique and improved cooking setup.

Cooking Tips and Recipes
Discover expert tips for mastering oil-less frying and explore a variety of delicious, healthy recipes tailored for the Char-Broil Oil-Less Fryer. Get inspired to create mouthwatering dishes effortlessly.
8.1 Best Practices for Oil-Less Cooking
For optimal results with the Char-Broil Oil-Less Fryer, always preheat the unit to the recommended temperature. Use the provided pans and utensils to ensure even cooking. Marinate or season foods generously before cooking to enhance flavor. Avoid overcrowding the cooking surface to allow proper air circulation. Flip food halfway through cooking for uniform browning. Adjust cooking times based on food thickness and type. For crispy textures, pat dry excess moisture from foods before cooking. Regularly baste or rotate items for consistent results and to prevent drying out.
8.2 Popular Recipes for the Char-Broil Oil-Less Fryer
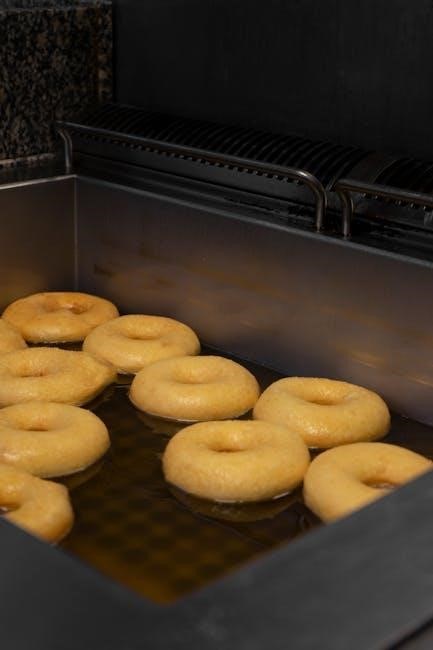
The Char-Broil Oil-Less Fryer excels at delivering crispy, flavorful dishes without oil. Popular recipes include classic fried chicken, golden fries, and crispy shrimp. For a twist, try oil-less fried pickles or cauliflower bites. Experiment with sweet treats like cinnamon sugar doughnuts or apple fritters. Marinate meats and veggies beforehand for enhanced flavor. Cooking times vary, but most recipes require 10-20 minutes. Use the fryer’s temperature control to achieve perfect results. These recipes showcase the fryer’s versatility, making it ideal for both savory and sweet creations.
8.3 Experimenting with New Dishes
Experimenting with the Char-Broil Oil-Less Fryer opens up endless possibilities for creative cooking. Try unique recipes like sweet potato fries, spicy chicken wings, or even desserts such as cinnamon sugar apple slices. Don’t hesitate to test new marinades or seasonings to enhance flavors. The fryer’s precise temperature control allows for perfect results. For vegetarian options, consider roasted vegetables or crispy tofu. Remember to adjust cooking times based on the dish’s texture and moisture. This versatility makes the fryer a great tool for inventing delicious, oil-free meals that surprise and delight your family and friends.
Warranty and Customer Support
The Char-Broil Oil-Less Fryer is backed by a comprehensive warranty covering parts and labor for a specified period. Dedicated customer support is available via phone, email, or online chat to assist with inquiries, repairs, or troubleshooting. Additionally, online resources and FAQs provide helpful information for common concerns.
9.1 Warranty Terms and Conditions
The Char-Broil Oil-Less Fryer is covered by a limited 1-year warranty from the date of purchase. This warranty includes repair or replacement of defective parts and labor under normal residential use. Registration is required to activate the warranty, and proof of purchase must be provided. Damage caused by misuse, neglect, or commercial use is not covered; For full details, refer to the warranty section in the manual or contact Char-Broil customer support.
9.2 Contacting Customer Service
For assistance with your Char-Broil Oil-Less Fryer, contact customer service via phone, email, or live chat through the official Char-Broil website. Phone support is available Monday-Friday, 8am-6pm EST. Email inquiries typically receive a response within 24-48 hours. Live chat offers real-time help during business hours. Visit the support section of the Char-Broil website for contact details and additional resources. Have your model number and purchase details ready for faster assistance. This service is available to address questions, troubleshooting, or warranty-related concerns.
9.3 Online Resources and Community Support
The Char-Broil Oil-Less Fryer is supported by extensive online resources, including the official Char-Broil website, social media platforms, and community forums. Visit the website for downloadable manuals, FAQs, and troubleshooting guides. Join online communities like Facebook groups or Reddit forums to connect with other users, share recipes, and gain tips. YouTube tutorials and blogs also provide detailed guides for optimal use and maintenance. These resources help users maximize their fryer’s potential and address any questions or issues they may encounter while cooking.
10.1 Final Thoughts on the Char-Broil Oil-Less Fryer
The Char-Broil Oil-Less Fryer is a game-changer for health-conscious cooking, offering crispy results without oil. Its innovative design and ease of use make it ideal for home cooks. With proper care, it ensures long-lasting performance. The manual provides comprehensive guidance, empowering users to maximize its potential. Whether frying, baking, or grilling, this fryer delivers versatility and flavor. It’s a must-have for those seeking delicious, oil-free meals. Embrace the freedom to experiment with recipes and enjoy a healthier culinary experience!
10.2 Encouragement for Safe and Creative Cooking
Always prioritize safety while exploring your culinary creativity with the Char-Broil Oil-Less Fryer. Follow the guidelines in this manual to ensure a hazard-free cooking experience. Experiment with diverse recipes and ingredients to unlock the fryer’s full potential. Regular maintenance will keep it performing optimally. Don’t hesitate to try new ideas—your kitchen is now a space for innovation and delicious, oil-free meals. Happy cooking and enjoy the journey of creating memorable dishes with your Char-Broil Oil-Less Fryer!